
Investing in residential solar power is one of the single most effective upgrades a homeowner can make to eliminate unpredictable power bills, increase property resale value, and gain long-term energy independence. However, when moving from the initial decision to a fully operational system, many homeowners are surprised to learn that going solar is not an overnight process.
While the actual construction work on your roof typically takes just one to two days, the complete end-to-end journey—from initial engineering designs to net metering approval—generally spans anywhere from 6 to 12 weeks. Understanding each phase of the installation timeline helps you set realistic expectations and ensure your project moves forward smoothly.
Knowing what happens behind the scenes allows you to ask the right questions and pick top-tier solar panel installers in my area who actively manage local building departments and utility paperwork without unnecessary delays.
The Master Solar Deployment Timeline
The total journey to home solar energy unfolds across five distinct phases. Here is how a professional installation project progresses from start to finish:
1. Phase 1: Site Audit and Engineering Blueprint Design (Duration: 1–2 Weeks)
The process begins the moment you sign a preliminary proposal. Before any permits are filed or hardware is ordered, a structural and electrical technician performs a comprehensive on-site survey.
During this initial audit, engineers evaluate:
- Structural Integrity: Assessing roof age, rafter spacing, and overall load-bearing capacity.
- Solar Irradiance and Shading: Using LIDAR tools or on-roof shade meters to map sun exposure throughout the year.
- Main Service Panel (MSP) Capacity: Checking your electrical panel’s busbar rating to determine if a main breaker upgrade is required for system integration.
Using these site metrics, solar engineers draft a customized Computer-Aided Design (CAD) plan set. These blueprints outline panel layout, array wiring, structural flashings, continuous grounding pathways, and inverter locations.
2. Phase 2: Municipal Permitting and Utility Interconnection Filings (Duration: 2–4 Weeks)
Once you approve the final blueprints, your contractor submits documentation to two distinct regulatory entities:
- The Authority Having Jurisdiction (AHJ): Your local city or county building department reviews the design to ensure compliance with structural load, wind uplift resistance, and local fire access setback codes.
- The Local Electric Utility Company: An interconnection application is filed with your power provider to verify that adding your system capacity will not destabilize local neighborhood power lines.
The Permitting Bottleneck: While forward-thinking municipalities use automated digital plan reviews (such as SolarAPP+) to issue permits in days, jurisdictions relying on manual plan reviews can take up to a month. Experienced local contractors track these regional timelines closely to avoid preventable administrative holds.
3. Phase 3: Equipment Delivery and Physical Installation (Duration: 1–3 Days)
After building permits and preliminary interconnection approvals are secured, the physical installation phase begins. Despite being the most visible part of the process, mounting hardware on your roof is actually the fastest phase.
The On-Site Physical Installation Sequence
1. Roof Deck Racking and Waterproof Flashing Installation:
Installers map rafter centers, secure lag-bolted aluminum racking attachments, and slide flashing boots beneath shingles to form a watertight seal.
2. High-Efficiency Photovoltaic Module Placement:
Technicians clamp solar modules securely to the aluminum racking rails, making individual microinverter or DC optimizer connections beneath each module.
3. Conduit Runs and High-Voltage AC/DC Electrical Wiring:
Licensed electricians run metal conduit along discrete rooflines, wire AC/DC disconnect switches, and integrate system breakers into the main electrical panel.
4. System Continuity, Grounding, and System Commissioning Tests:
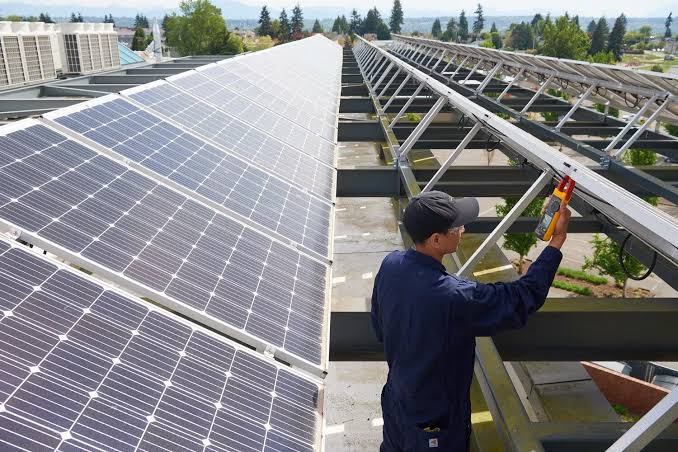
The lead electrician tests electrical continuity, verifies ground wire bonds, and conducts voltage checks to prepare for final city inspection.
4. Phase 4: Municipal Safety and Code Inspection (Duration: 1–2 Weeks)
With the physical work complete, your system sits offline while the contractor schedules a mandatory on-site inspection with a local municipal building or electrical inspector.
The inspector checks that the installation matches the approved CAD blueprints, verifies that rapid shutdown safety switches are installed according to National Electrical Code (NEC) rules, and confirms that all outdoor electrical enclosures are properly labeled and grounded. Once passed, the inspector issues a signed job card, closing out the municipal building permit.
5. Phase 5: Meter Exchange and Permission to Operate (PTO) (Duration: 2–4 Weeks)
The final step bridges your complete rooftop setup with the power company. Your contractor sends the passed city inspection document to your utility company to request Permission to Operate (PTO).
The utility schedules a service visit to swap your old single-direction electric meter for a bi-directional smart meter. This meter tracks both the power you draw from the grid at night and the excess solar electricity your roof feeds back during peak daylight hours. Once the smart meter is set and the utility issues your official PTO letter, you can turn on the system breakers and start generating your own clean power.
Timeline Comparison: Professional Local Installer vs. Uncoordinated DIY
Working with seasoned local professionals makes a massive difference in how quickly your project reaches activation.
| Project Stage | Certified Local Solar Installer | Uncoordinated DIY / Amateur Setup |
| CAD Blueprint Design | 1–2 weeks; fully code-compliant | High risk of blueprint rejection and redesigns |
| AHJ Permit Processing | Fast; direct experience with local city requirements | Delays from incomplete code documentation |
| Physical Installation | 1–2 days; experienced, fully insured roof crews | Multi-week projects; safety and weather risks |
| Inspection First-Pass Rate | High; built strictly to regional electrical standards | Failed checks requiring costly fixes |
| PTO & Net Metering Sign-Off | Handled completely by contractor staff | Extended utility paperwork back-and-forth |
Conclusion: Partner with Proven Experts for a Smooth Transition
Going solar is a major property upgrade that requires careful coordination across structural engineering, local municipal approvals, high-voltage electrical work, and power company rules. While waiting for municipal permits and utility approvals takes patience, working with an experienced local contractor keeps your project organized and avoids unnecessary delays.
Choosing a trusted local partner ensures your clean energy system is built safely, approved quickly, and ready to deliver reliable, bill-cutting power for decades to come.